Introduction
When it’s time to test API, postman is the tool that comes first in mind, in this blog we will let you know “How to Setup Postman for API Testing?”. This guide is for beginners, but mid-level software testers could also learn something new from the blog. Follow the following steps carefully and you will be able to set up the testing environment on your system, to start API testing.
The desktop application and the web version are its two versions. As many software developers prefer to use the Postman desktop program, we will concentrate on setting it up and utilizing it for API testing in this step-by-step approach.
Important: The Postman Chrome app is deprecated. so go ahead with the desktop application.
How to Setup Postman for API Testing
Are you ready to explore the world of API testing? In this guide you will learn ‘How to Setup Postman for API Testing?. Lets get started.
Download and Install Postman
Please visit the website https;//www.postman.com/downloads/ to obtain the version of Postman, for your operating system whether it is Windows, macOS or Linux.
Once the download is complete double click on the installer file and follow the instructions provided on your screen to successfully install Postman.
Double click the installer you just downloaded and follow the on-screen guide to complete the installation.

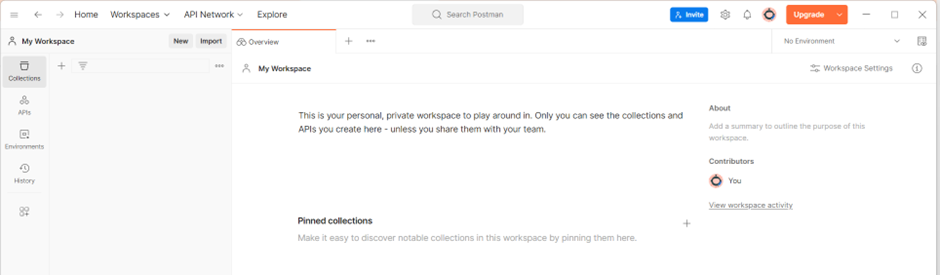
After smooth installation, it opens automatically, following is the default interface of the postman.

Brief Overview about Postaman
Here are too many features, as a beginner it will be hard for you to remember all these settings, so let’s discuss the basic functionality of the postman, that we use most of the time.
Sign up and Sign In
You need to have an account with Postman to use it, to keep it simple visit the Postman website and create a free account.
Workspaces
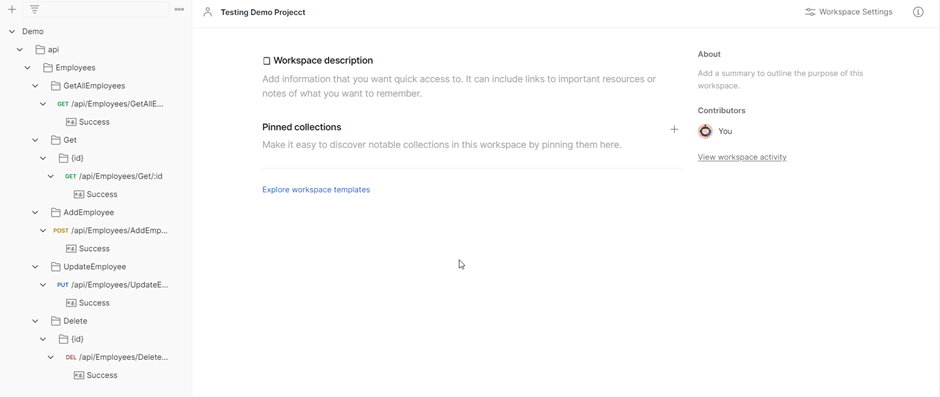
Workspaces in Postman are collaborative areas where you can organize your API-related work. You can create workspaces for different projects or teams.
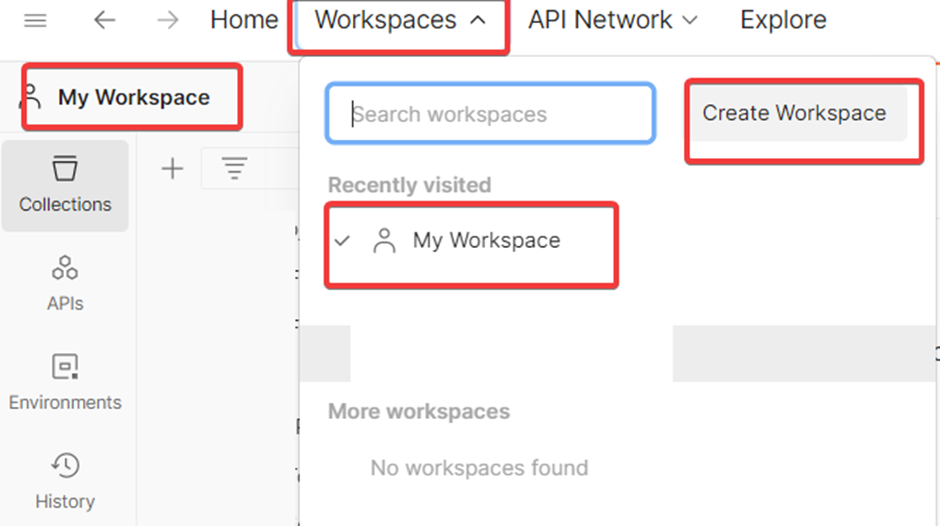
To create a workspace, click on workspaces on the top left and click “New Workspace as shown in the picture.
So, the concept of workspaces is to separate different projects or teams, by placing related work of the same project in a separate place, which we call workspace in Postman.
Environments
Environments allow you to manage variables and configurations for your API requests. In the upcoming sections, you will see the implementation of all these concepts that will clear your confusion if you have any.
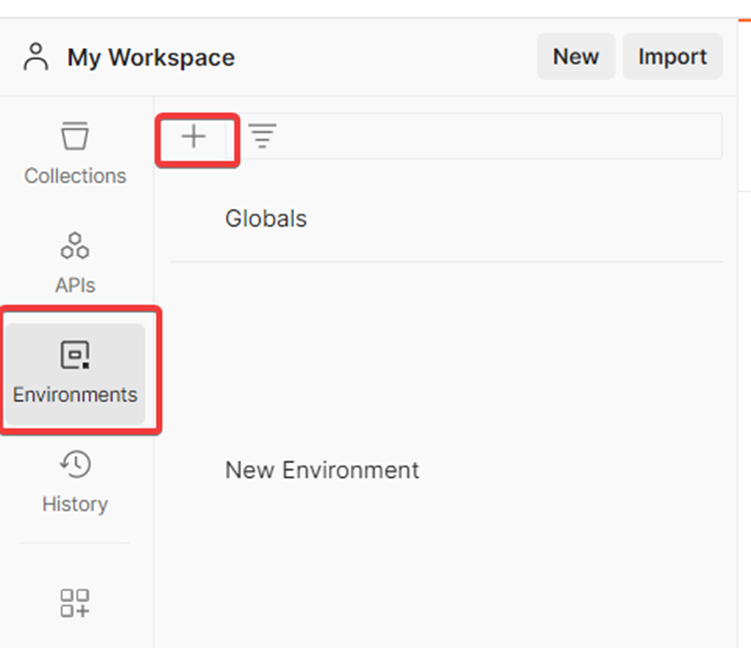
To create an environment, click on “Environment” quickly look in the top-right corner, and select “Manage Environments.” You can create a new environment and define variables there.
Collections
Collections are used to group and organize your API requests. They help you structure your tests and maintain order.
When I work on a project, with three environments. Development, staging and production. I typically create a collection, for each one. Inside these collections I organize endpoints by using folders and subfolders.
To create a collection simply click on the “button located in the top left corner. Then, click “Collection.” Give it a description and a name.
You can then add requests to the collection by clicking the “Add Request” button in the collection or by creating new requests and assigning them to the collection.
Creating API Requests
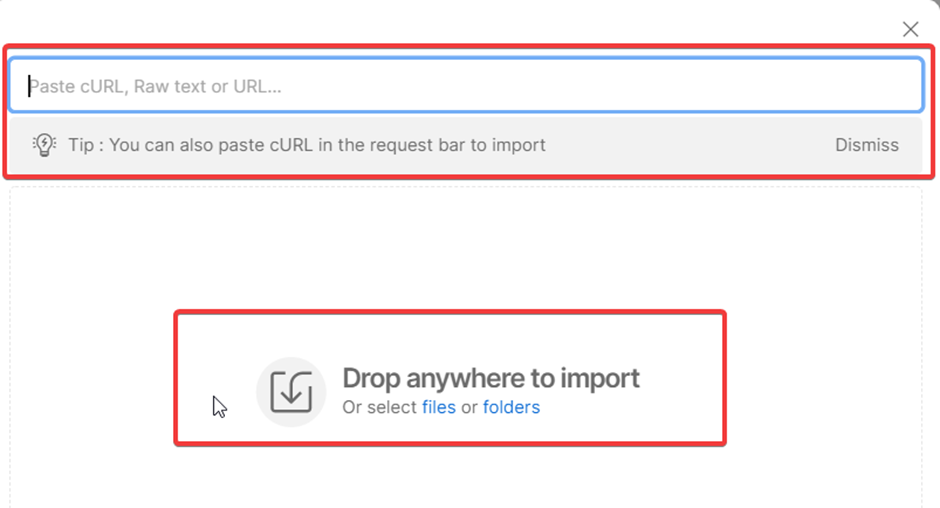
You can add all the requests manually following the documentation of the APIS, but the smart way, as Swager is part of the APIs, you can directly import the JSON file from Swagger to make the work easy.
To import you have two options; the easiest one is to copy the Swagger link and paste it into Postman. If that doesn’t work you can try downloading a JSON file from Swagger and importing it into Postman instead.
To manually generate an API request click on the “button, in the top left corner and choose “Request.”
If you want to create an API request simply click on the “New” button located in the upper left corner and select “Request.”
To create a new API request manually, click the “New” button in the top-left corner and select “Request.” Give it a name and description.
Do visit the blog If you lack basic knowledge about API, especially Rest API, do visit this link,
Choose the HTTP method (such as GET or POST), enter the API endpoint (URL), and add any necessary headers, parameters, or request body data in the request builder.
To send the request, click the “Send” button. The response will show up in the response pane.
Response Handling
Postman will display the response status, headers, and body. You can easily inspect the data returned by the API.
You can also save responses, set up tests to validate responses and use response data in subsequent requests.
Sharing and Collaboration
Postman allows you to collaborate with team members. You can share workspaces, collections, and environments with others.
To share, click the “Share” button within a workspace, collection, or environment, and enter the email addresses of the collaborators.
Demo Project
We need APIs in order to show API testing. One way to do this is to use publicly accessible open-source APIs, but I’m not going to take that route. Instead, I’ve constructed an example ASP.NET Core Web API called “Demo” and uploaded it to GitHub for you. Here is the link.
Prerequisites
- you need Visual Studio installed on your computer
- with .NET 6 SDK
Open Buil and Run the Project
- Open Visual Studio and load your “Demo” project.
- Build the project by clicking on “Build” in the top menu and selecting “Build Solution.” This will compile your code.
- To run the ASP.NET Core Web API project, press the “F5” key or click on the “Start Debugging” button (a green arrow) in the toolbar. Your project will start.
Accessing Swagger
- As your project starts, it will automatically navigate you to the Swagger documentation page.
- No need to manually enter the Swagger URL; it will open in your web browser, providing a user-friendly interface for exploring and testing your API endpoints.
Overview of Your Demo Project – Technical Details
Employee Class
- You have created an “Employee” class in the “Demo” namespace.
- This class defines properties like “Id,” “Name,” “Address,” “City,” and “Region” for an employee.
EmployeesController
- You have a controller class named “EmployeesController” in the “Demo.Controllers” namespace.
- It contains several HTTP methods that handle various API endpoints:
- GetAllEmployees: Retrieves a list of all employees.
- Get/{id:int}: Retrieves a specific employee by their ID.
- AddEmployee: Adds a new employee to the list.
- UpdateEmployee: Updates an existing employee’s details.
- Delete/{id:int}: Deletes an employee by their ID.
List of Employees
- You’ve initialized a list of employees within the “EmployeesController” to store employee data.
API Testing with Postman
Now you have set up Postman on your system, and you also have a demo project. Now it’s time to start testing these endpoints using Postman.
When you run your code in Visual Studio, the following page will open, see snap:
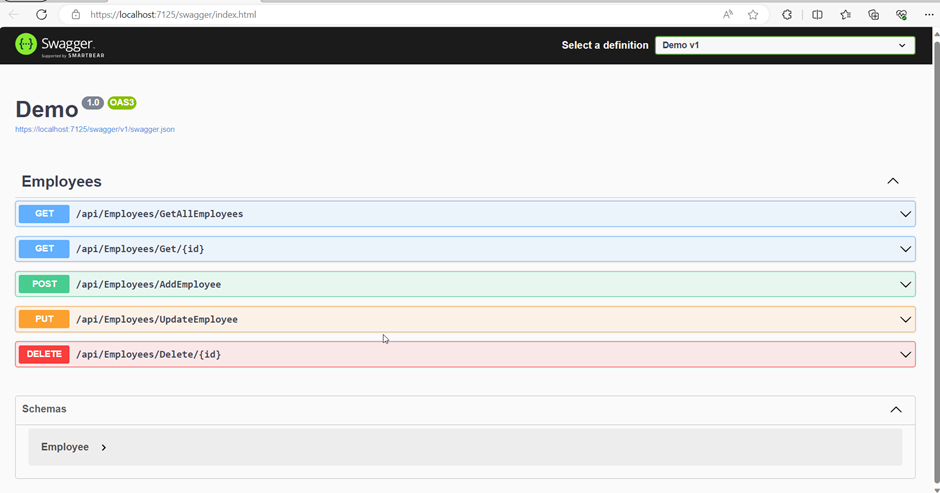
You can copy the URL and using that you can import it in the Postman, or you click on the swagger. Json link to get Json and import the Json file in the Postman, the way you follow does not matter, at the end it would look like as shown in the below snap.
Test Assertions
Postman provides several test assertions for REST API testing, which are used to validate various aspects of the API response.
Create an environment and add a variable to it with a title, baseURL as shown in the below snap.
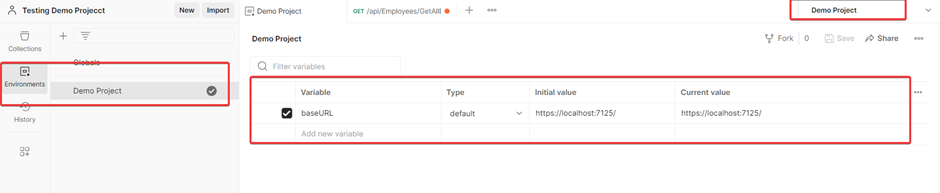
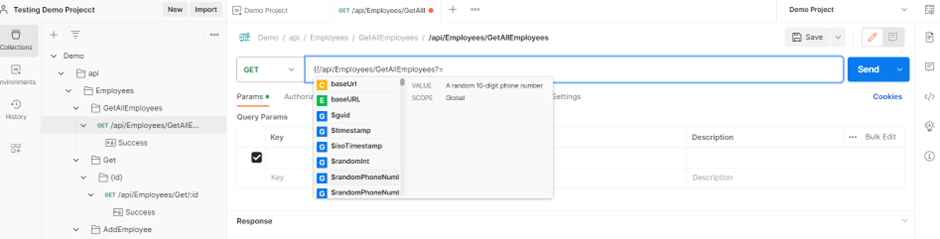
You have noticed that there is a global environment, that is mostly used for placing common configurations of different collections.
Go back to your collection, and correct the URL, In Postman double flower brackets, are used to read the value from the variable, as shown here in the snap.
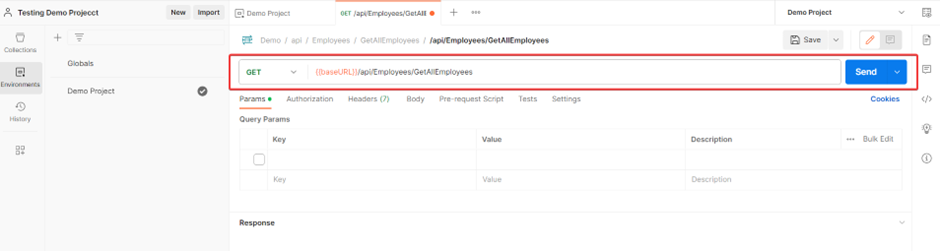
Verify the functionality of the Get All endpoint of the API
Double-click the GetAll endpoint from Postman and make sure the URL is correct, hit the send button, on success it will return a 200-status code and data in the response, on failure it will return 404 or some other code.
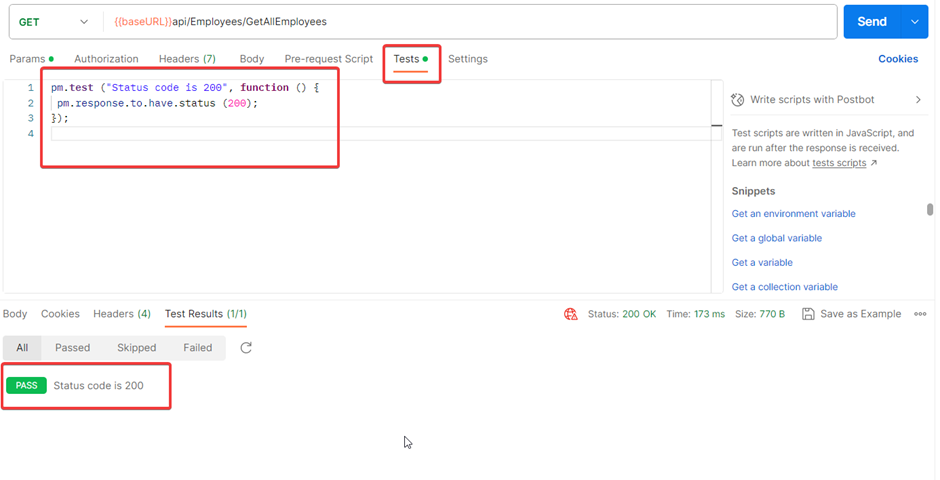
One way is to manually verify the status code, but we often need to have a test for it as when we have multiple APIs, we can not verify it manually for each endpoint, to write a script to automate the test, Go to the tests section in the postman and add the following js code:
Status Code Check
The status code declares whether the API is working or not. Let’s do some API testing.
pm.test ("Status code is 200", function () {
 pm.response.to.have.status (200);
});
This test will only pass if the response status code is 200 and fails otherwise. See snap.
Response Time Check
To validate that the API is responding within an acceptable time frame, we use the following test
pm.test ("Response time is less than 300ms", function () {
 pm.expect (pm.response.responseTime).to.be.below(300);
});
The test will pass if the response time is less than 300ms and fails otherwise.
Response Body Check
To check that the API is returning the expected data in the response body, you can use the following test-
pm.test ("Response body contains expected data", function () {
 var jsonData = pm.response.json();
 pm.expect (jsonData.name).to.eql(“John”);
});
This test will pass if the response body has a JSON object with a “name” property equal to “John” and fails otherwise.
Response Header Check
To check that the API is returning the expected headers, you can use the following tests-
pm.test ("Response headers contain expected data ", function () {
 pm.response.to.have.header("content-type", "application/json");
 pm.response.to.have.header("cache-control", "no-cache");
});
Here we test some header.
Saving Token in a Variable
you might need the following code for taking access token and save it in variable for later use.
pm.test('Token is setup',()=>{
const jsonData = pm.response.json();
const access_token = jsonData.access_token;
pm.collectionVariables.set("authToken",access_token);
const authToken = pm.collectionVariables.get('authToken');
pm.expect(authToken).to.eql(access_token)
});
This test will set a value in the authToken collection variable and will pass if the authToken is properly saved.
Drawbacks of Using Postman
- Limited automation capabilities
- Learning curve, especially for beginners
- Not ideal for in-depth load testing
- No built-in version control
- Limited collaboration features
- Some advanced features require a paid subscription
- Restricted collection runner (limited to 25 per month)
Conclusion: Setting Up Postman for API Testing
we have explored the essential steps to set up Postman for API testing, catering to both beginners and mid-level software testers. Postman offers a user-friendly interface and powerful functionalities for testing APIs effectively.
To Test gRPC endpoints you can visit our this blog.
Key Takeaways
- Downloading and Installing Postman:
- Basic Functionality
- Sign Up and Sign In
- Workspaces
- Environments
- Collections
- Creating API Requests
- Response Handling
- Sharing and Collaboration
Thank you for such a detailed and comprehensive article its quite helpful for me